
Davinci Resolve (DR) is a free, popular, powerful, and fully featured video editor. Many of the features are designed for professional editors using footage shot in raw or Log that require colour correction to be applied. However, setting it up to edit out of camera footage without any colour correction can be challenging as there are multiple settings to get right.
Apple Macbook Pro computers from 2021 and later have an XDR (HDR) display that can be used successfully to edit both SDR and HDR footage but setting up DR to do so correctly can be puzzling. Sometimes footage looks over saturated after it is imported into DR’s timeline, and sometimes footage can look washed out when it is exported. The settings below ensure out of camera footage from recent iPhones looks identical to:
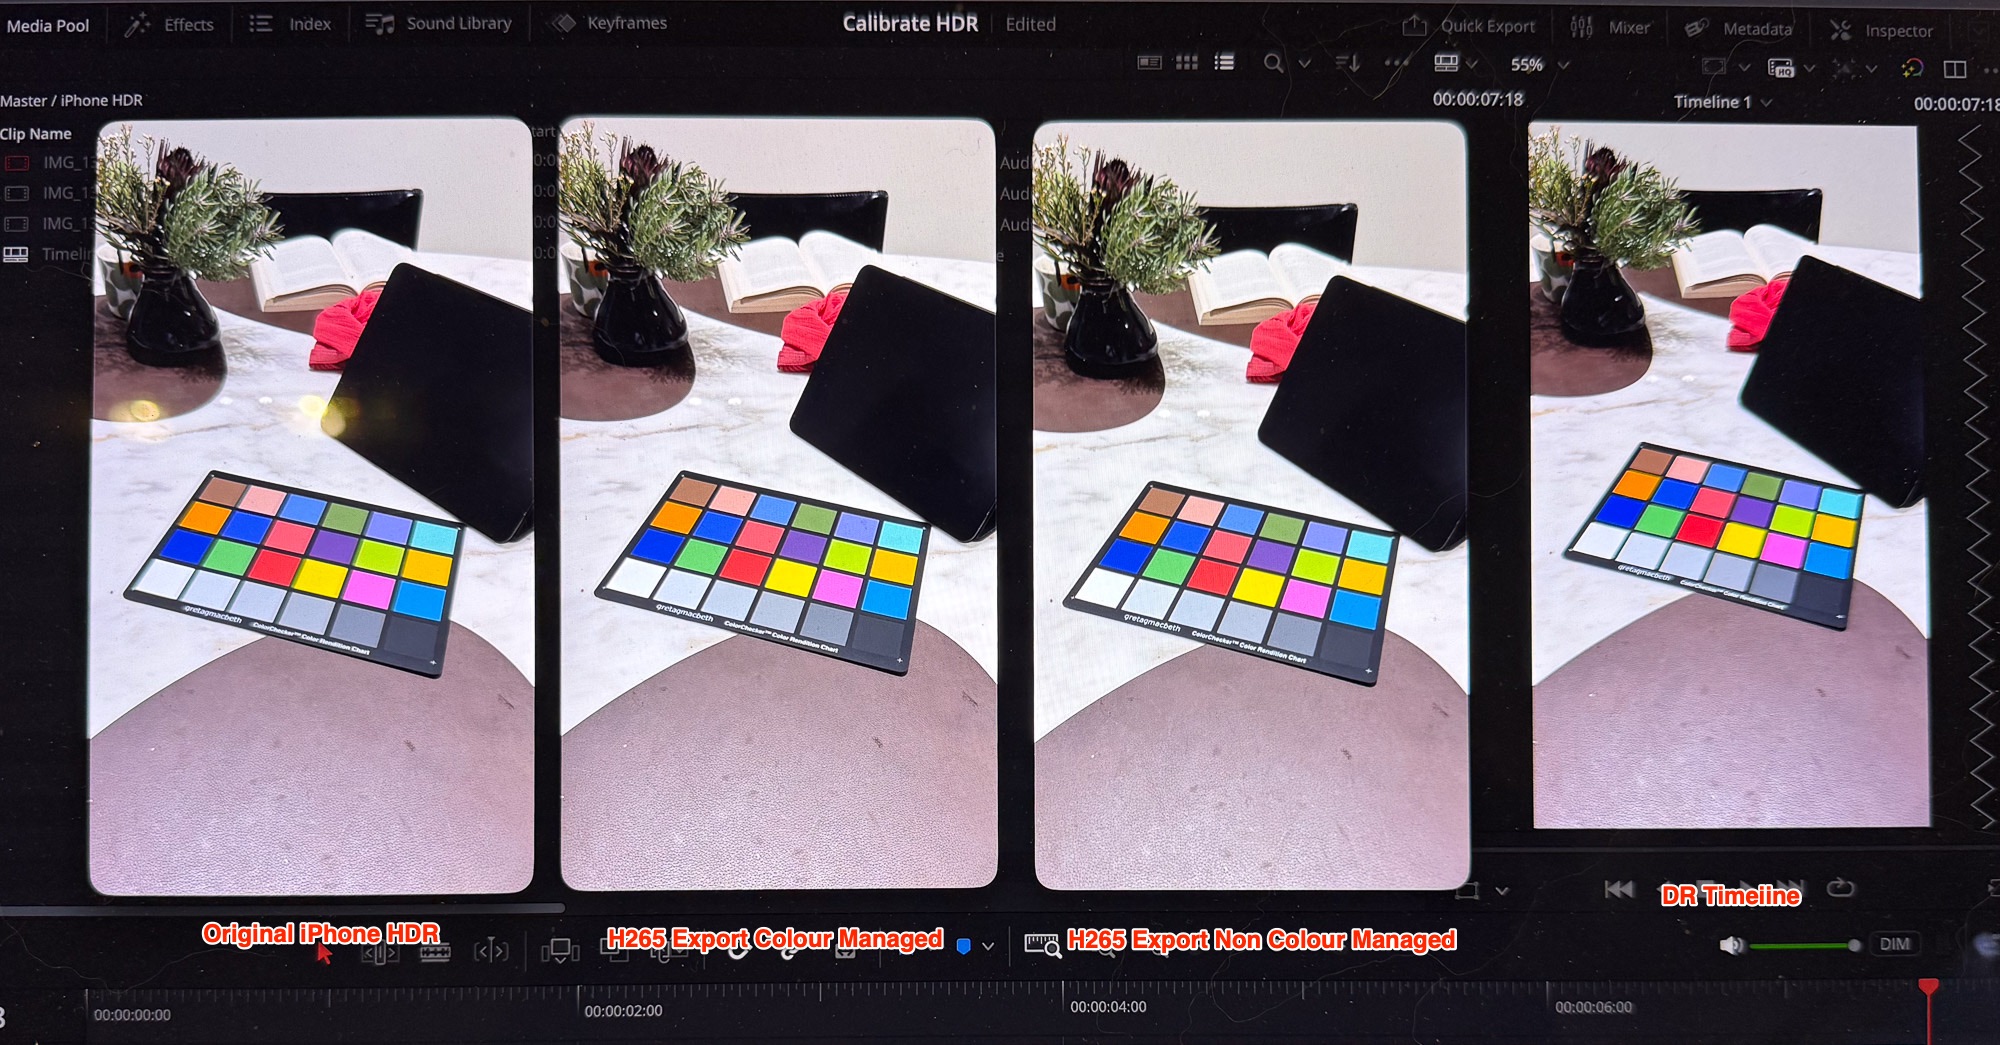
– the footage after it is imported into a DR Timeline without using any LUTs or colour adjustments; and
– footage exported from DR after edits have been done.
The simple test you can do with your settings (to compare it with the ones below) is to import the out of camera footage into a timeline, select 1-2 seconds, export the selection, and comapre the exported footage. Does it look identical to the original? The best test footage to use is to shoot a color reference target like the X-Rite Colorchecker, but any scene with a variety of colors and good dynamic range will do. The only change you should notice is that the exported footage is that it will have a different codec to the original footage.

– Choose the Display Preset HDTV Video. It is one of the Reference Modes. The XDR Display (P3-1600) setting also works and allows adjust to the screen brightness to suit your environment
– Create a new project in DR with Color Management setting for Color Space & Transforms using DaVinci YRGB Color Science, Timeline color space: Rec.709-A and Output color space “Same as Timeline”. You can also choose DaVinci YRGB Color Managed with SDR as the Color processing mode and SDR Rec.709 Output color space. Either will work.

– Import the footage and place in a Timeline. Open the original footage in Quicktime Player. The footage should look identical (color and luminance) to the footage in the Timeline.
– Go to the Deliver tab and choose an export profile eg H264 Master or H265 Master. Do not make any adjustments to the presets. Export the footage and open in Quicktime Player. The footage should look identical to the source and timeline.

– Choose the Display Preset HDR Video (P3-ST 2084). This is critical to get the correct luminance. The screen might look dark compared to what you may be used to but it will display the HDR luminance range correctly
– Create a new project in DR with Color Management setting for Color Space & Transforms using DaVinci YRGB Color Managed, Color processing mode HDR and Output color space HDR HLG.
– *These settings only apply if you are working on a MacBook Pro with an XDR display. Editing HDR footage on a non-HDR display will require different settings.

– Import the footage and place in a Timeline. Open the original footage in Quicktime Player. The footage should look identical (color and luminance) to the footage in the Timeline.
– Go to the Deliver tab and choose the export profile H265 Master, do not make any changes to the preset. Export the footage and open in Quicktime Player. The footage should look identical to the source and timeline.
A. For SDR content with picture profile OFF and using a Creative Look setting. Footage from the camera use the colourspace/gamma Rec.709A. This is the same as an iPhone’s SDR footage.
B. For HDR content with picture profile PP10, the footage is in HLG BT2020 which is the same as an iPhone’s HDR footage