- Hide menu

Blog

Reducing bufferbloat on a 1000/50 NBN service

Bufferbloat is a known problem and can be exacerbated on fast Internet connections like a Gigabit fibre service. One way to reduce bufferbloat and throttling by ISPs is to use a router that has smart queue management algorithms.

On a Unifi Dream Machine, this is a setting called Smart Queues and it apparently uses an algorithm called FQ-CoDel. You specify a download and upload speed. This is particularly needed to avoid access being affected by the NBN policer.

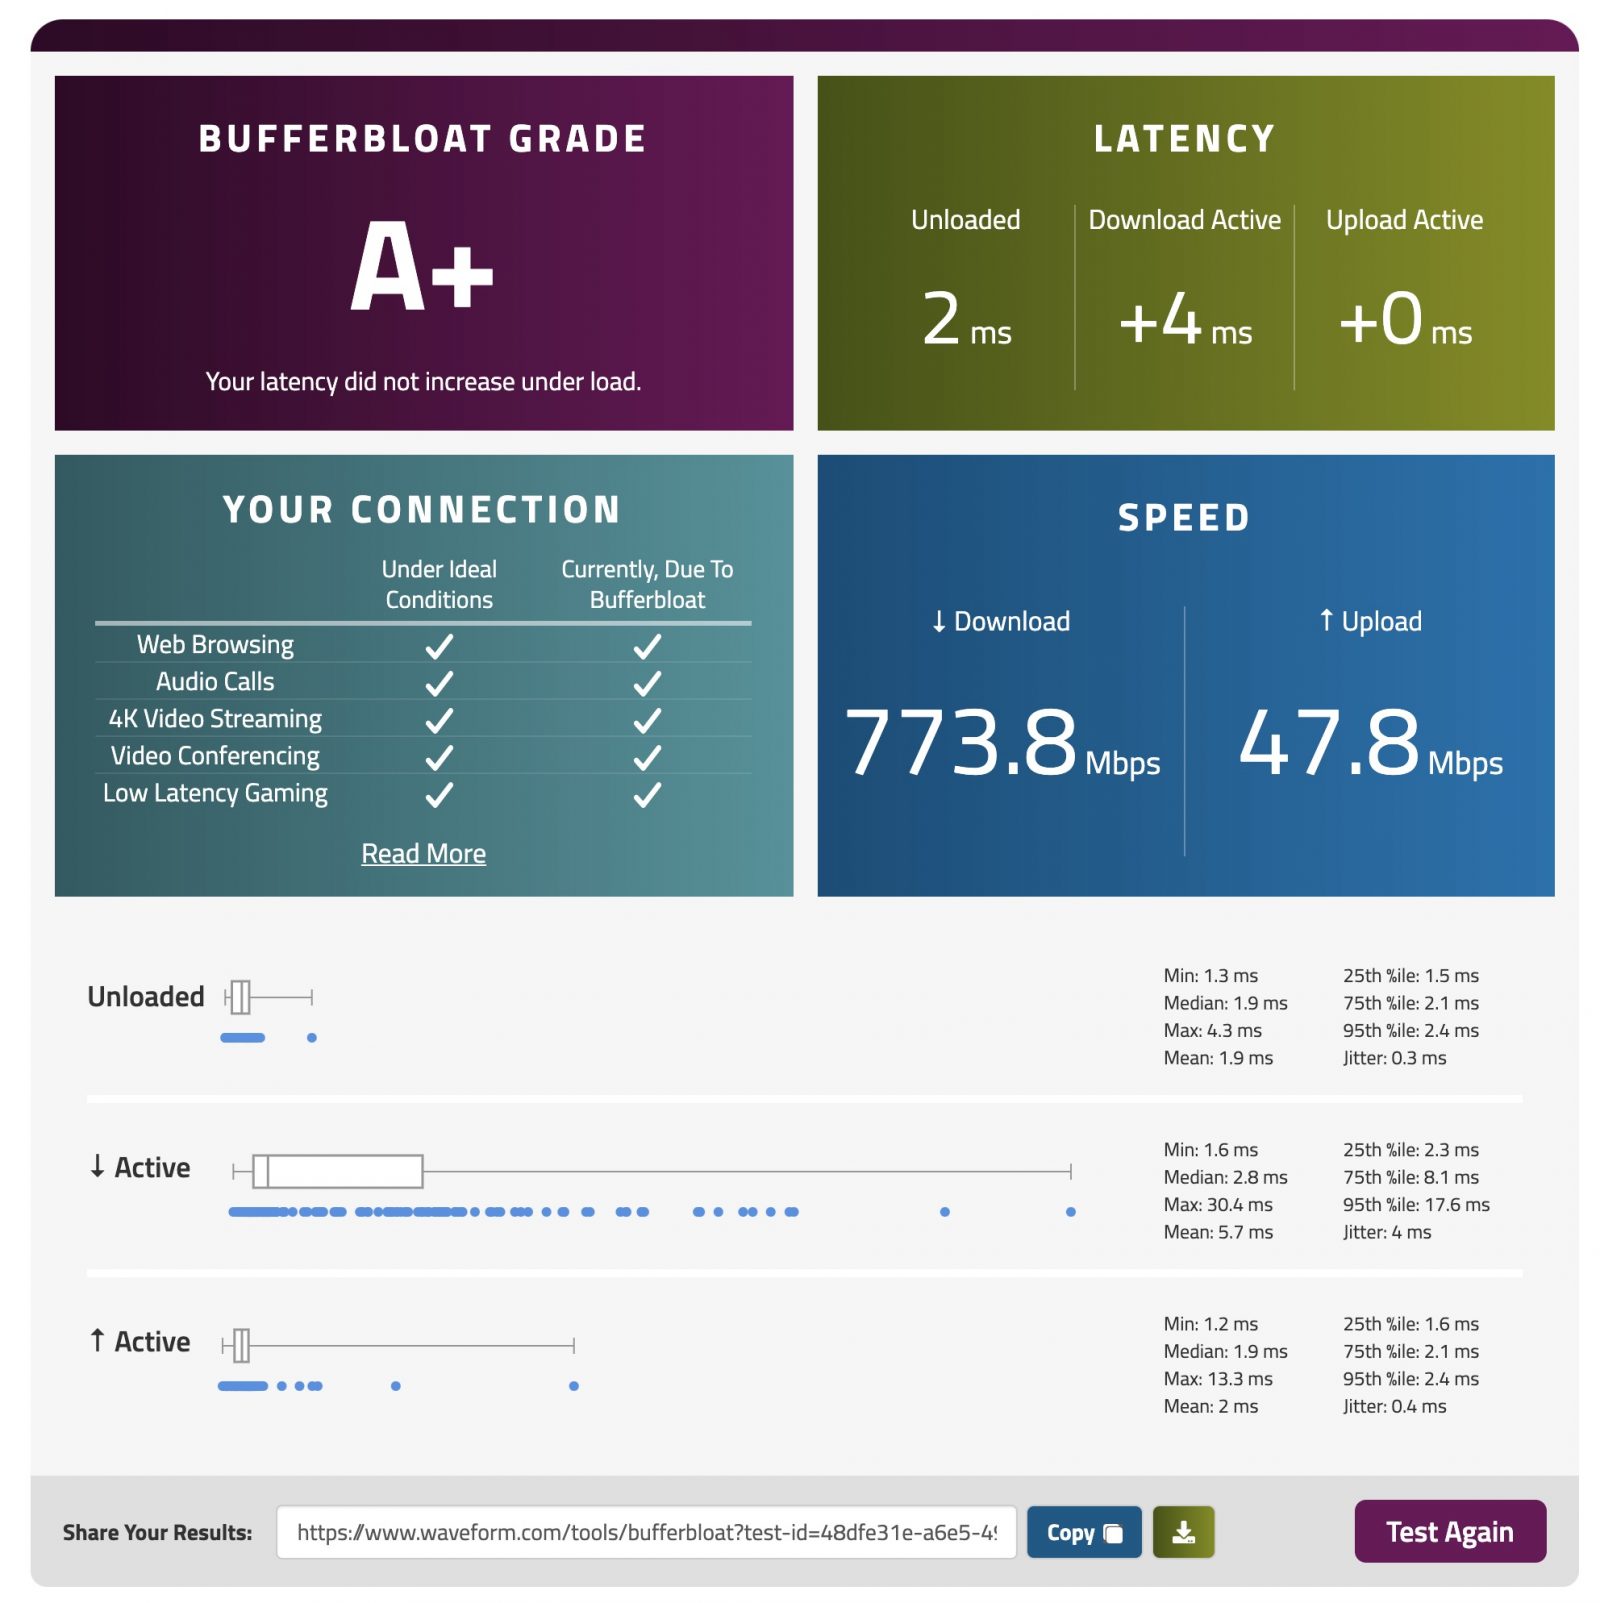
With a setting of 1000 mbps down and 50 mbps up on an AussieBroadband FTTP 1000/50 service, this is what the Bufferbloat test on Waveform delivers:

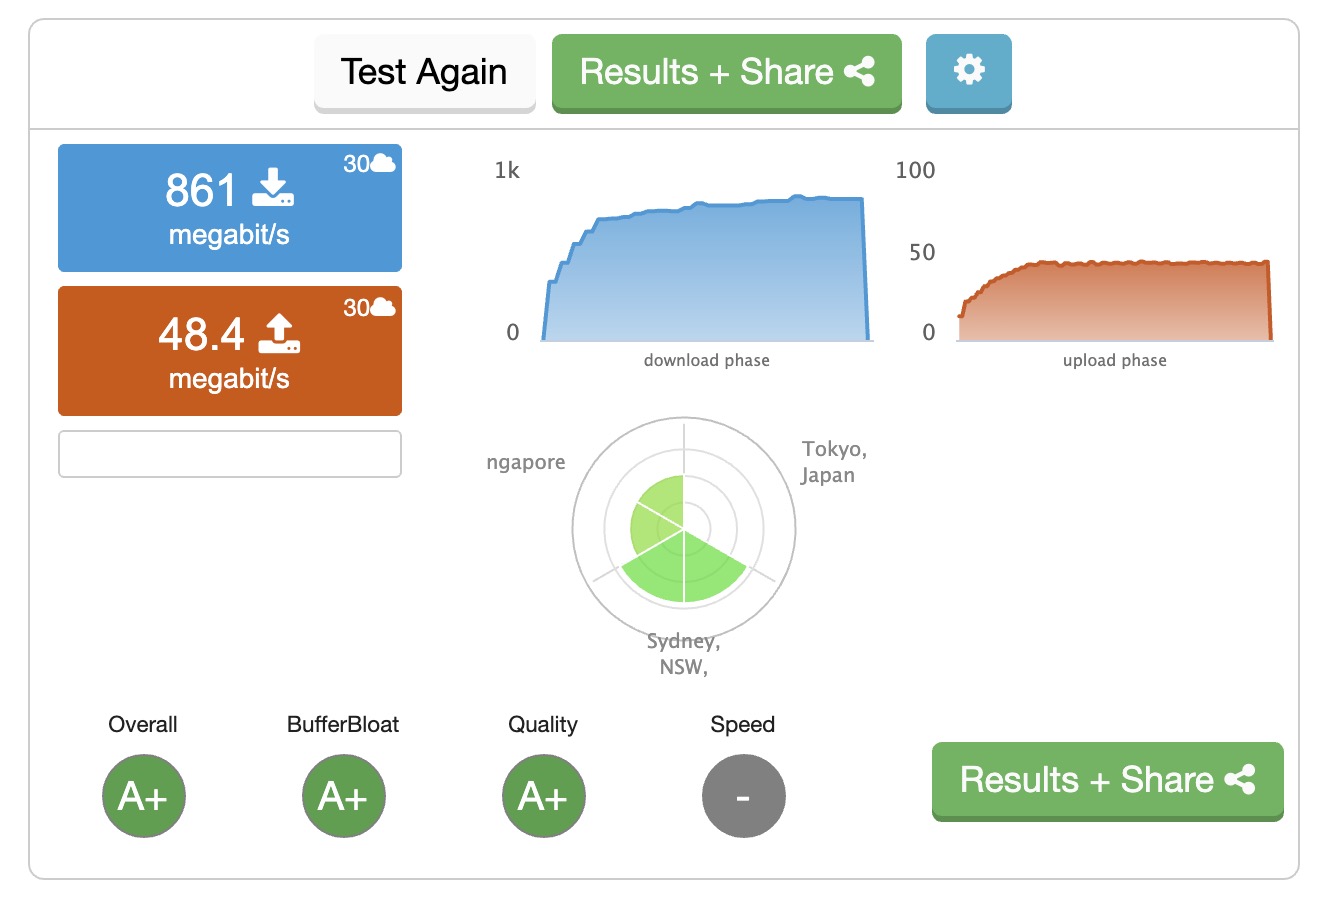
And on the DSL Reports Bufferbloat speedtest, a similar result:

Showing hostnames in Pihole with IPv6 enabled

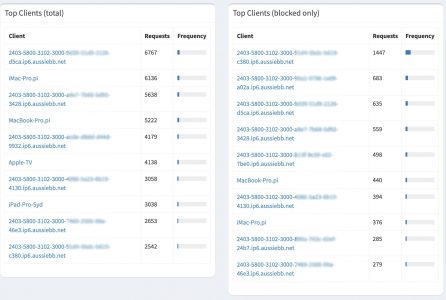
One of the features of Pihole is its ability to show a query log of which device made a query to a particular domain. This works fine on an IPv4 network. But when IPv6 is enabled, and the Pihole is used for DNS resolution the query logs have entries with unhelpful hostnames. This arises because Pihole doesn’t issue the IPv6 address for the device and the name it shows is the reverse DNS entry for the address. There are ugly workarounds. This article proposes a few, and there’s a script here, but none are really turnkey solutions. The problem is shown in the screenshot below.


My solution is to block all DNS requests on the IPv6 network from my clients to the Pihole. This forces the clients to use IPv4 which is logged by the Pihole and the request is shown against the IPv4 hostname. This requires the Pihole to be the DHCP server for the IPv4 addresses.

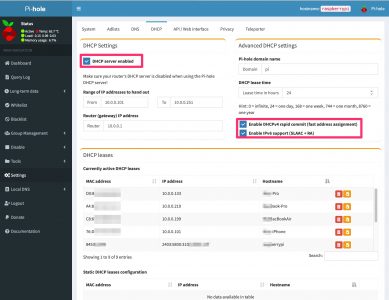
This is what the Pihole’s DHCP screen looks like.


One anomaly I encountered in my setup is I could not block DNS requests if the Pihole was on the same VLAN as my client devices. As you can see from the screenshot, the clients are on the 10.0.0.0 network The firewall on the Unifi Dream Machine does seem to be able to do this. So my workaround is to move the Pihole on to another VLAN, eg 192.168.11.0, which the firewall is able to block. So the Ethernet port of the Pi is set on the 192 VLAN and the Wireless LAN is on the same 10.0.0.0 VLAN as my clients, handing out DHCP addresses. Voila. Hostnames are back on a fully functioning IPv6 network.

Setting up VLANs with a Mikrotik Cloud Router Switch CRS125-24G

My network uses a Unifi Dream Machine and implements VLANs. I needed a managed switch for some Ethernet devices and I had a Mikrotik Cloud Router Switch CRS125-24G from a few years ago. Previously I never used it for VLANs, and there’s no guide on how to do this except for a video on YouTube: “How To Configure Mikrotik Cloud Router Switch VLAN’s CRS1xx…” – the good news is that it the UDM and Mikrotik seems to work together.

Hope it helps if you’ve got one of these switches.

Fixing “Your Mac was unable to communicate with your Apple Watch”

After reseting an iCloud password, every Apple device that uses the iCloud account will need to authenticate again. For an Apple-centric user, that would be an iPhone, iPad, Apple Watch, Macbook and may be a few other devices. All seemed to go well except the Apple Watch no longer unlocked the Macs. Even unpairing and re-pairing didn’t fix the issue with various errors including “Your Mac was unable to communicate with your Apple Watch” after re-pairing the watch to the phone. But thanks to this tip from user stoska992 on Apple Communities, the problem is solved. Steps:

  1. Open “Keychain Access”
  2. In “View”, enable “Show Invisible Items”
  3. Search for “Auto Unlock”
  4. You should see a whole bunch of application passwords for “Auto Unlock: XXXX’s …”
  5. Select all records and delete (this will reset/disable auto unlock on other Macs if you use multiple Macs)
  6. Whilst still in “Keychain Access”, search for “AutoUnlock” (no space)
  7. There should be 4 entries for “tlk” “tlk-nonsync” “classA” “classC”
  8. Select 4 records and delete (don’t worry if they re-appear, the system repairs this automatically)
  9. Open “Finder” and navigate to “~/Library/Sharing/AutoUnlock”
  10. There should be two files “ltk.plist” and “pairing-records.plist”
  11. Delete both files
  12. Open “System Preferences” and try enabling auto unlock. You may need to enable it twice, the first attempt will fail. [And you may need to restart your Mac as well before enabling Auto Unlock.]

Regenerating Thumbnails in Lightroom

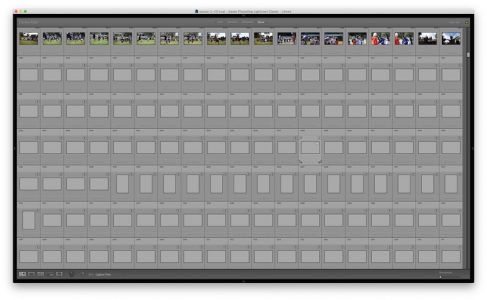
When you import another catalog into an existing one, or when the preview cache file is not available, Lightroom is unable to show the thumbnails of the photos in the catalog. The catalog will just have grey rectangles like the image on the right when Grid View is selected. This makes it impossible to browse the catalog.

As you scroll through the grey thumbnails Lightroom will regenerate the thumbnails. The issues is if there are thousands of images, you will need to scroll through the whole catalog by tapping on the Page Down button and waiting for thumbnails to be generated for every screen. There is no automatic way to tell Lightroom to do this. Note, this is not the same as generating a Preview for your images. Generating a Preview doesn’t automatically generate a thumbnail.

To simplify the task, I wrote a short AppleScript that will automate this task and allow you to not have to tap the keyboard manually. Just enter this code via the Script Editor and click on the Play/Run button.


repeat 40 times
   activate application "Adobe Lightroom Classic"
   tell application "System Events" to key code 121
   delay (5)
end repeat
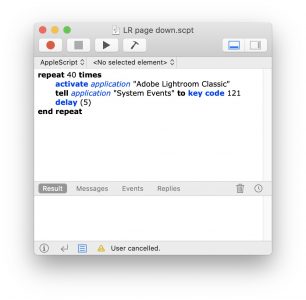
You can customise the number of times to repeat the page down, and how long to delay depending on how fast your Mac is and how many thumbnails you can display on your screen. Hint: Choose the smallest thumbnail size and hide the left and right panels to maximise the number of thumbnails.