Be careful putting your iPhone 14 Pro face-down. There seems to be a bug that sometimes activates that camera and it remains on. This causes the battery to completely run flat in 6 hours.
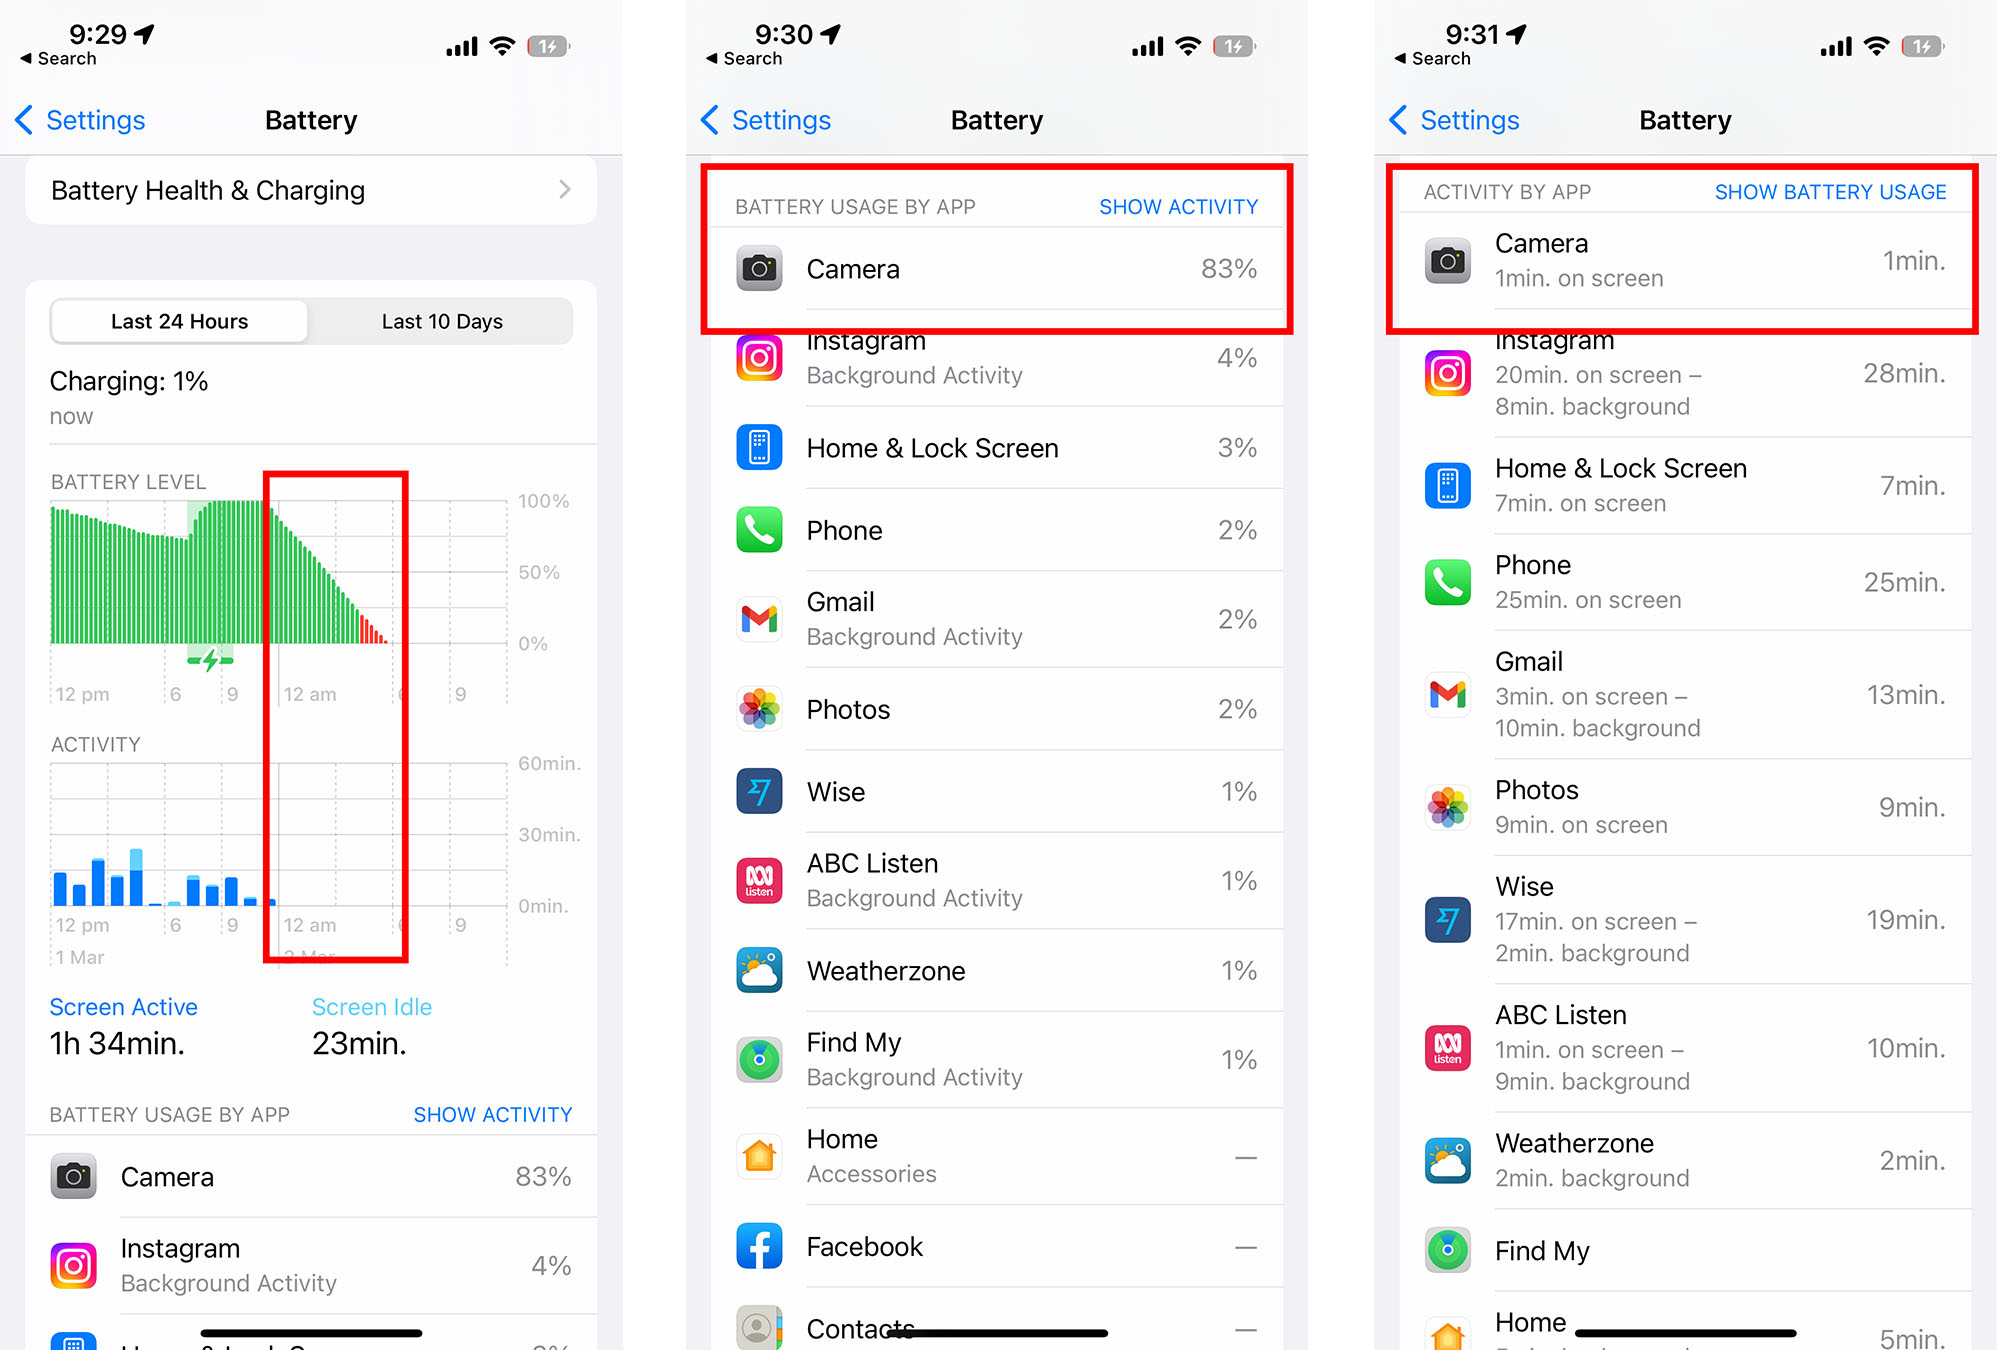

Be careful putting your iPhone 14 Pro face-down. There seems to be a bug that sometimes activates that camera and it remains on. This causes the battery to completely run flat in 6 hours.
Two friends had this problem recently and both turned out to be broken VPN apps. Neither could remember why they installed them in the first place. And neither even thought that those apps could have been a possible cause. Interestingly, neither could be disabled using the VPN switch in the Apple Settings app. The simple solution was to delete the actual app from the phone. The two offending apps were Surfshark and Phone Guardian. Could these apps be vectors for malware? One of them reported that access stopped after accepting a suspicious invitation to follow an account on Instagram.


Dropbox is a popular and favourite cloud service. Many photographers want to send photos directly from their camera to an editor or colleagues. Modern cameras like the Canon R3, R5, R6, 1DX and the Nikon Z9, D5, D6 have the ability to send images using the FTP protocol either wirelessly via WiFi or with wired Ethernet.
However, Dropbox and other popular cloud-based file services do not offer the ability to receive files via FTP.
Digital Ocean sells hosted servers running the linux operating system. On these servers, a combination of Dropbox software and FTP server software like vsftpd can be configured to achieve a simple, integrated service that accepts live images via FTP which are then pushed to a computer via Dropbox.
The following versions of the software have been tested: Ubuntu 20.04.5 LTS. vsftpd 3.0.3. Dropbox for Linux 165.4.4300 64 bit. macOS Ventura 13.1 (22C65). macOS Dropbox v164.4.7914.
More to come…
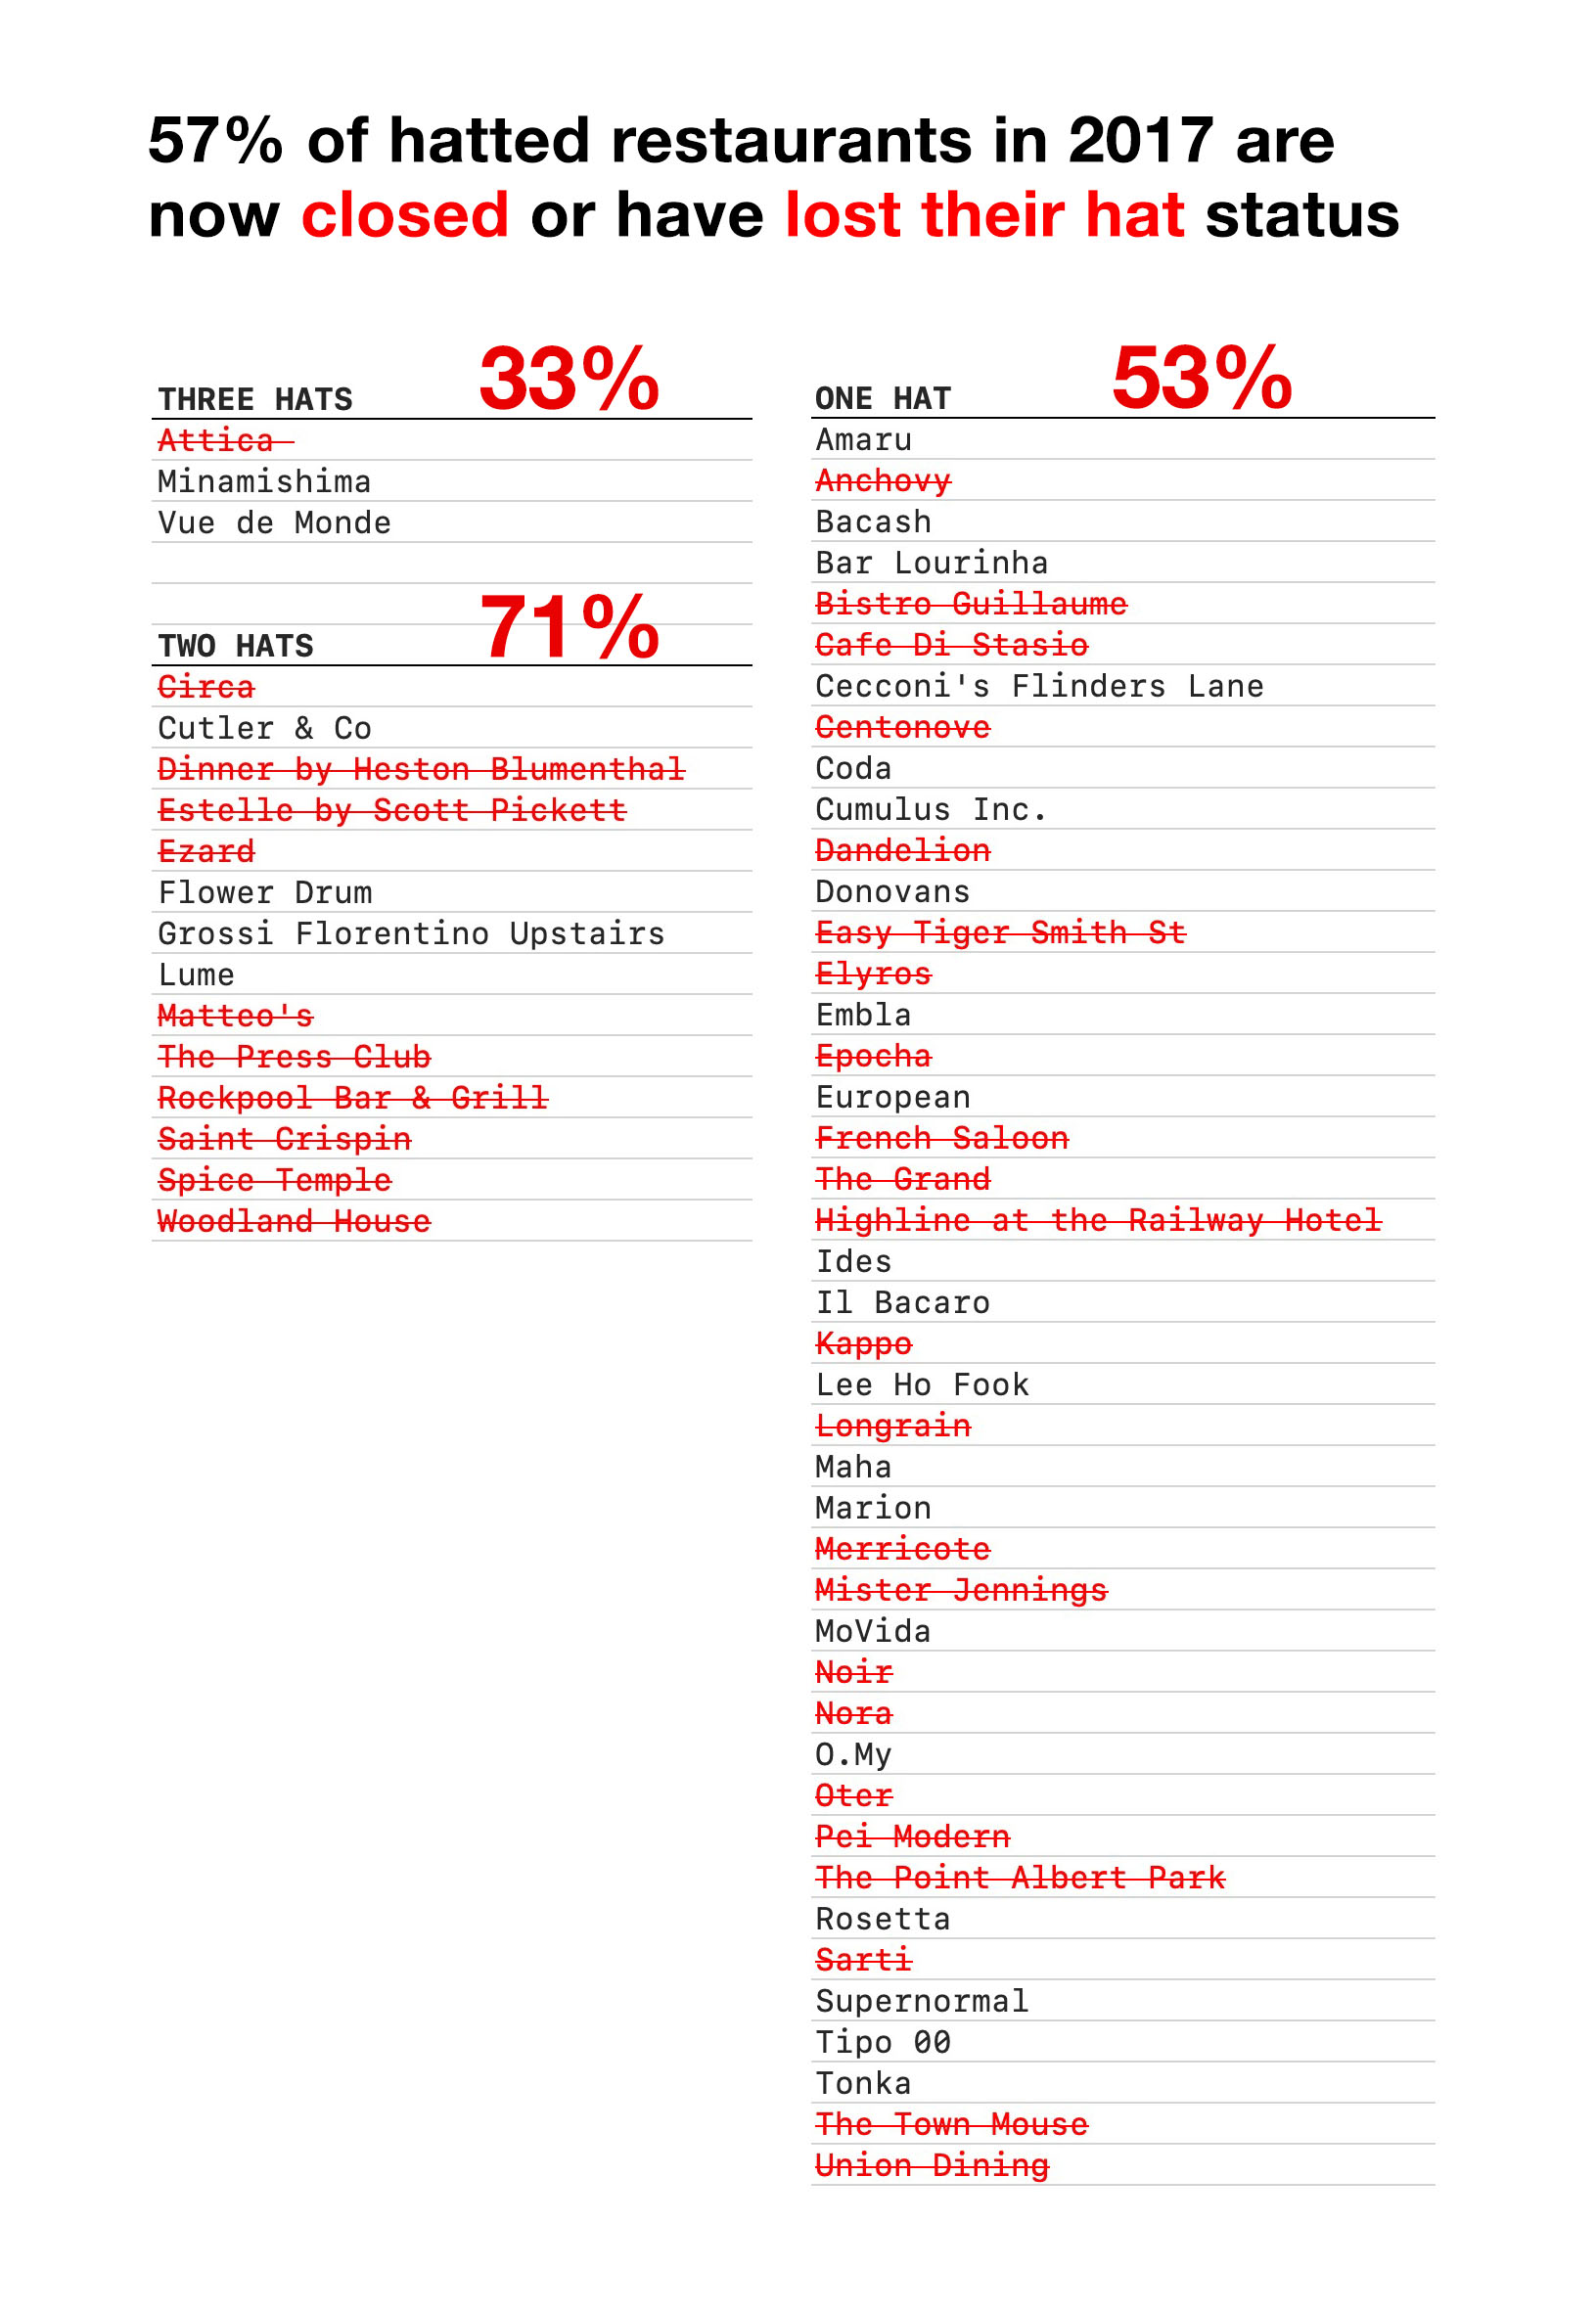
The 2023 Good Food Guide for Melbourne is out. 57% of hatted restaurants in 2017 are now closed or have lost their hat status. Let’s have a look at the restaurants that were awarded hats 5 years ago and where they are now:
Here are the details (*closed or lost hat status):
THREE HATS in 2017
Attica*, Minamishima, Vue de Monde
TWO HATS in 2017
Circa*, Cutler & Co, Dinner by Heston Blumenthal*, Estelle by Scott Pickett*, Ezard*, Flower Drum, Grossi Florentino Upstairs, Lume, Matteo’s*, The Press Club*, Rockpool Bar & Grill*, Saint Crispin*, Spice Temple*, Woodland House*
ONE HAT in 2017
Amaru, Anchovy*, Bacash, Bar Lourinha, Bistro Guillaume*, Cafe Di Stasio*, Cecconi’s Flinders Lane, Centonove*, Coda, Cumulus Inc., Dandelion*, Donovans, Easy Tiger Smith St*, Elyros*, Embla, Epocha*, European, French Saloon*, The Grand*, Highline at the Railway Hotel*, Ides, Il Bacaro, Kappo*, Lee Ho Fook, Longrain*, Maha, Marion, Merricote*, Mister Jennings*, MoVida, Noir*, Nora*, O.My, Oter*, Pei Modern*, The Point Albert Park*, Rosetta, Sarti*, Supernormal, Tipo 00, Tonka, The Town Mouse*, Union Dining*

In October 2022 Microsoft disabled some authentication protocols for their hosted Exchange Server email service. This means some clients like Outlook 2013 will not connect unless it uses Modern Authentication. This is not enabled by default, and it needs to be enabled and Outlook needs to be forced to use it. Here are some tips on how to fix this issue: