Davinci Resolve (DR) is a free, popular, powerful, and fully featured video editor. However, setting it up to edit footage in HDR and exporting HDR clips for Instagram and YouTube can be challenging as there are multiple settings to get right, and a lot of outdated tutorials and FAQs on the Internet.
Apple Macbook Pro computers from 2021 have an XDR (HDR) display that can be used successfully to edit HDR footage but setting up DR to do so correctly can be puzzling. Sometimes footage looks over saturated after it is imported into DR’s timeline, and sometimes footage can look washed out when it is exported. The settings below ensure:
- Exported videos from an HDR timeline have the correct metadata to be recognised in Instagram and Youtube
- The exported videos look the same as they did in DR’s edit timeline
- Footage from iPhone and Sony cameras can be used in the same timeline
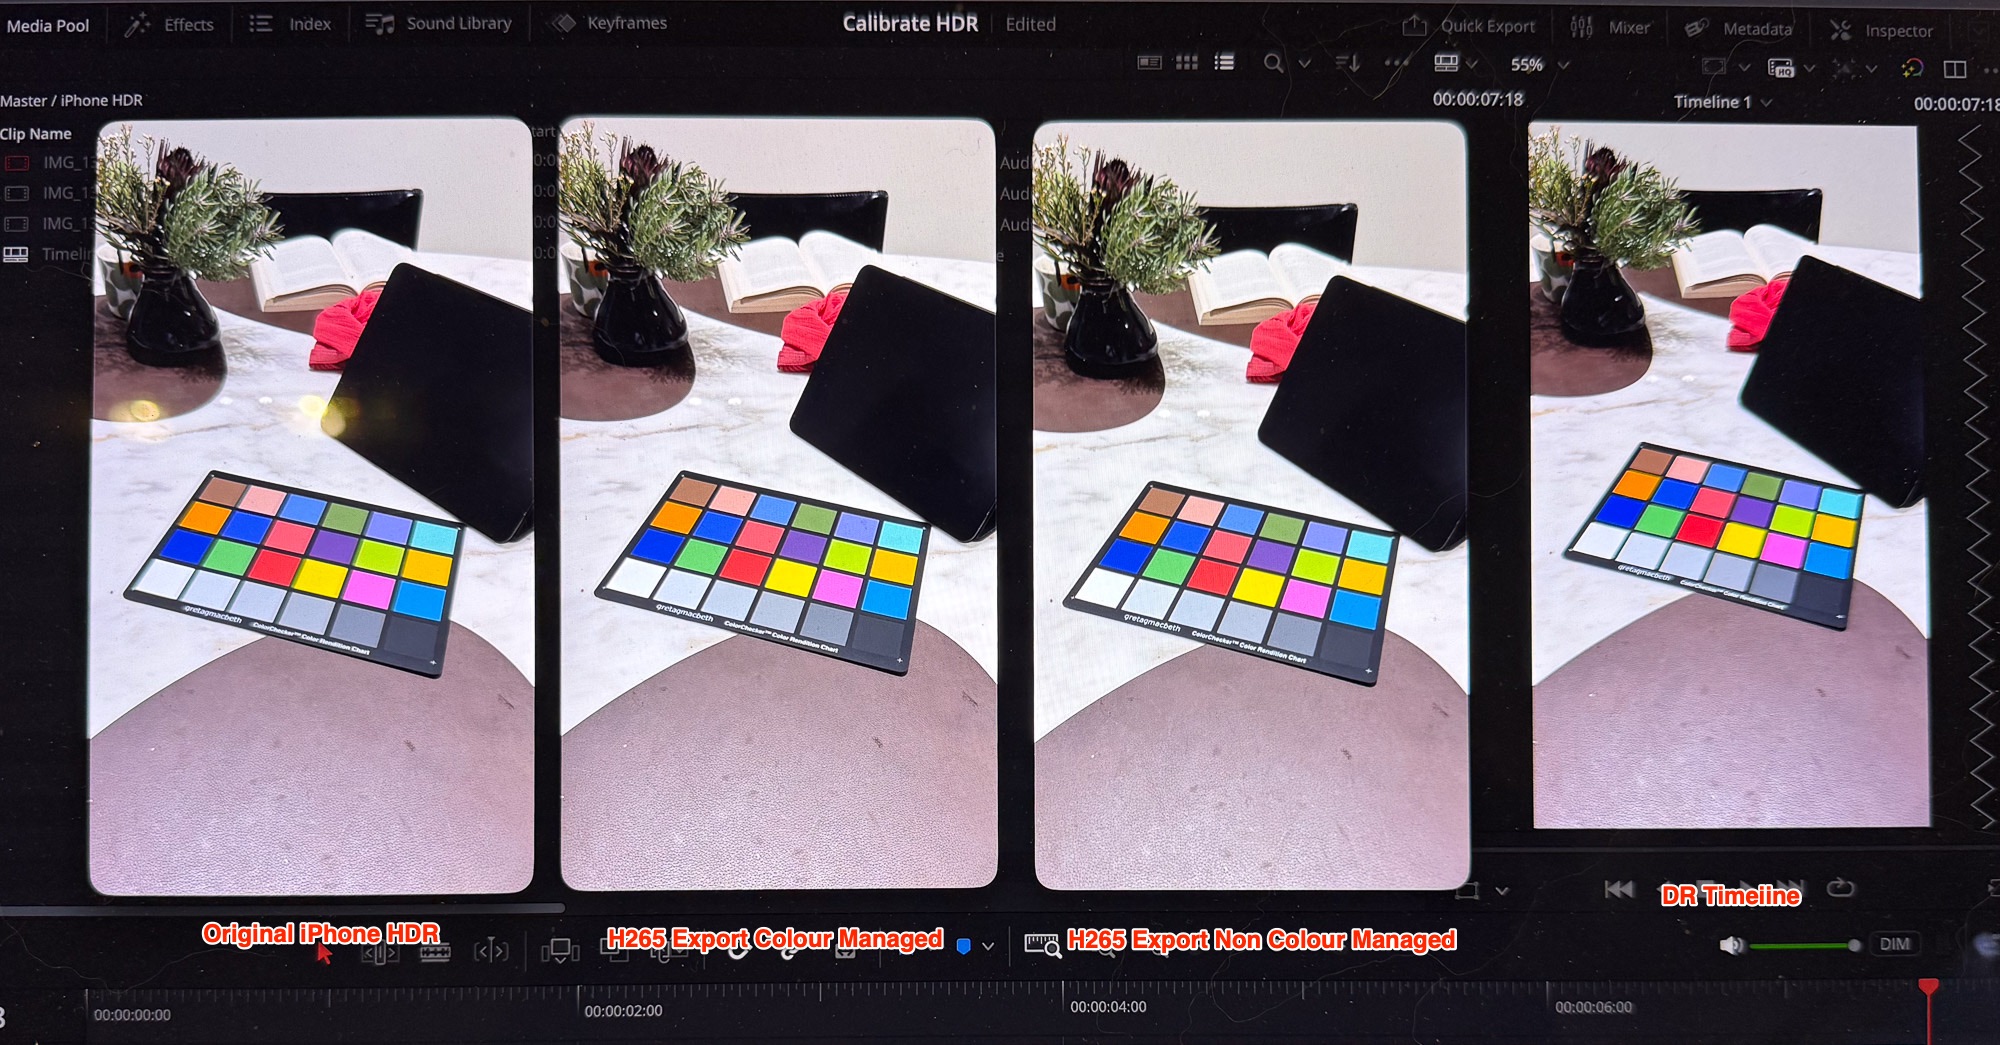
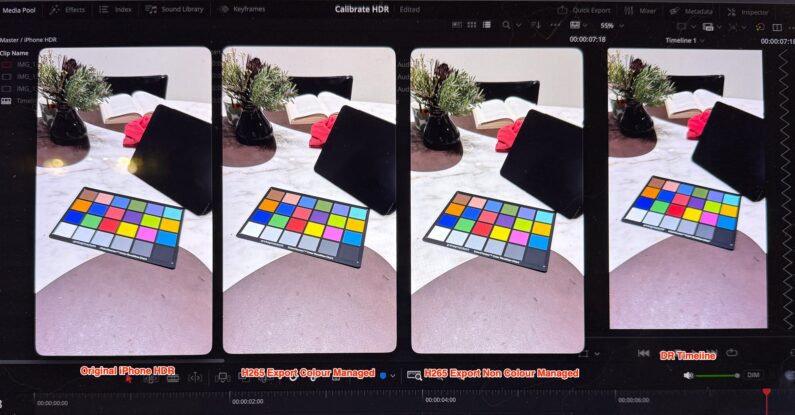
The best test footage to use is a color reference target like the X-Rite Colorchecker, but any scene with a variety of colors and good dynamic range will do. This will allow you to match the footage from Sony cameras and iPhones. The image below shows how the footage from the camera, DR’s timeline and exported clips are identical, despite different codecs and software.
Settings for HDR footage* from iPhone (not ProRes) and Sony cameras using SLog3.
(*These settings only apply if you are working on a MacBook Pro with its XDR display. Editing HDR footage on a non-HDR display will require different settings and not covered here.)

– On the iPhone, make sure “HDR Video” option is turned on. This setting is in Settings/Camera/Record Video
– On your Sony camera, enable Log option and choose S-Gamut3.Cine/S-Log3, There are several ways to enable this depending on the camera model
– On your MacBook Pro, choose the Display Preset HDR Video (P3-ST 2084) in Settings. This is critical to get the correct luminance on your HDR display. The screen might look dark compared to what you may be used to but it will display the HDR luminance range correctly
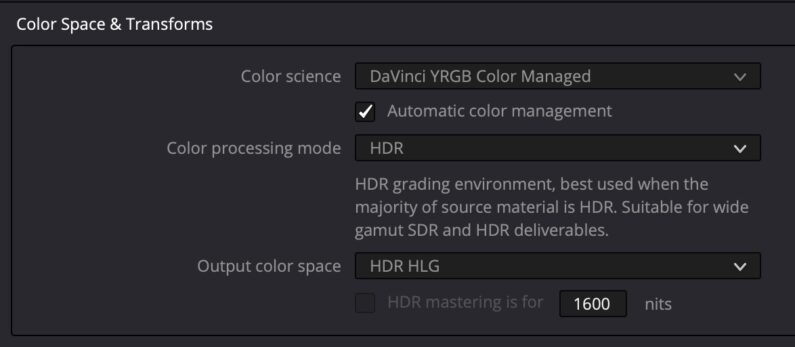
– Create a new project in DR with Color Management settings as shown in the screenshot below. The Color Managed option is the simplest and cleanest approach. Note, the “free” version of DR is able to edit and export HDR footage, you don’t need to have the Studio version. Make sure the Output color space is HLG – any other settings like Rec.2020 ST2084 won’t work for Instagram, despite many tutorials saying otherwise.
– Import the footage and place in a Timeline.
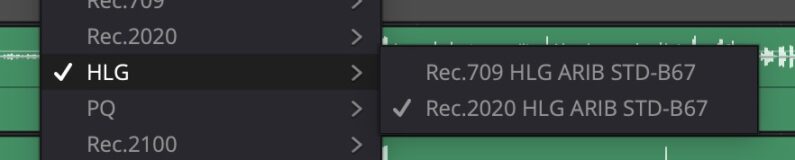 – For iPhone footage, set the clip’s Input Color Space to HLG/Rec.2020 HLG as shown in the screenshot
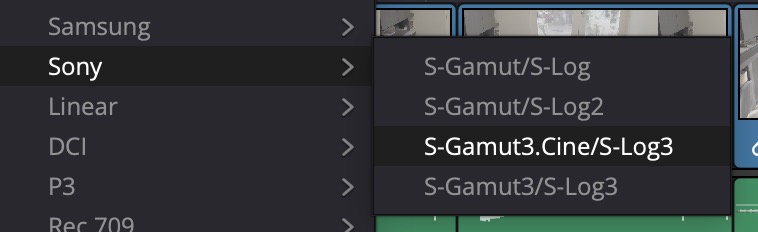
– For Sony log footage, set the Input Colour Space to S-Gamut3.Cine/S-Log3 (assuming this is what you shot the footage in. S-Gamut3.Cine is the preferred format if you intend to grade for HDR)
– Make the color gradings you want to match the colours from the two cameras
– To export, go to the Deliver tab and choose the export profile H265 Master, or use H265 Master via Quick Export, do not make any changes to the preset. Export the footage and open in Quicktime Player. The footage should look identical to the video in the timeline
– Upload the footage into Instagram as a Reel and observe that the screen confirms that it is in HDR format. You can also use the Instagram Edits app to make further edits, and the HDR format will be preserved
– For more information, there is an excellent Youtube video here.
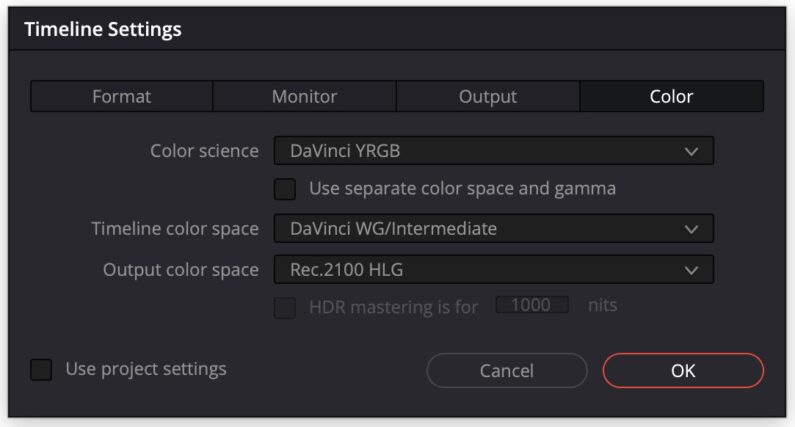
Non Colour Managed Settings
If you do not use DR’s Colour Managed timeline, the setting to use is shown below. A very important note – do not use Rec.2020 ST2084 as the Output color space if you want to generate Instagram compatible HDR. While YouTube will accept ST2084, Instagram will not. Here is the setting:
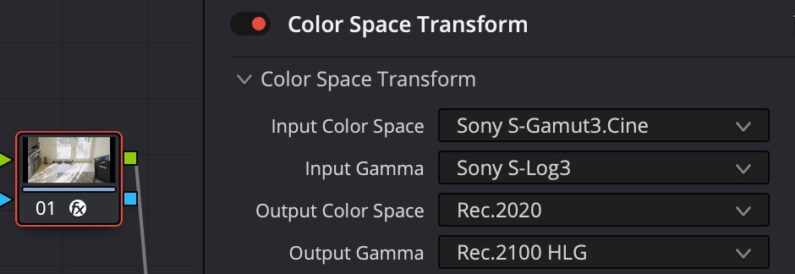
You will then need to use a Colour Space Transform CST node for Sony footage. This can be separated into two nodes if you want to add other nodes for color grading, but this CST is the minimum needed to have the footage render correctly in DR and when exported. The iPhone footage does not need a CST.: